Shop & Create
Need we say more? So many things to try on, so little time! Whatever you want, it's here. And if it's not, you can make it and sell it!
Frequently Asked Questions
Throw an Event
Plan your Event
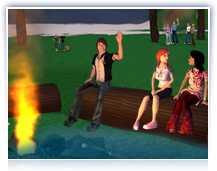
Do you have a great idea for a party or some other fun event? Here are some tips on how you can do it! Have a party in your PAZ, House, Lot, or Clubhouse and invite all of your friends. Or if you own a FunZone, Frontier Zone, or Neighborhood, you may want to have a picnic, stage a play, or run a Buggy race. Whatever you’re thinking of, there’s a lot of planning to do, so let’s get started!
Shop for an Outfit
When hosting a party, you’ll definitely want to look your best. You can get hairstyles and colored contacts in Shop Central, name brand styles in the Specialty Shops section, and custom-made fashions in the Auctions. There are tens of thousands of items to choose from! Once you find an outfit, use the Change Me menu to put it on. Find your favorite combination and save it as an Outfit. It will appear in Outfit Favorites for you to access whenever you wish.
Decorate Your Place
Now for the fun part! Whether you’re having a party, hosting a race, or putting on a play, you’ll want to make sure your place is decorated for a successful event! There are countless items to choose from in Shop Central and the Auctions, and the possibilities are endless for a number of themes. A great place to start is the “Home and Garden” section. When you’ve found items you’d like to purchase, click the Buy button. The item will automatically be placed in your inventory.
Be Prepared
If throwing a party, you might want to consider buying a Jukebox to add some music to your atmosphere. In a race or paintball event, you may want to provide some loaner vehicles or paintball guns. Whatever kind of event you’re hosting, be sure to be prepared for the needs of your guests and even consider handing out drinks or party favors.
Find Your Place
If you don’t already have a place to throw your event, you can find one at Places in There Central. Simply set up your search parameters and click Search for a FunZone. If you find a place that belongs to someone, feel free to ask them for permission to host there. Otherwise, there are many free Zones you can host at, just look for There Zones. Once you find the perfect place, you’re ready to move on!
Schedule Your Event
Now it's time to schedule your event. On the Zone page, click on the Add New Event button to open the Event Set Up page. Then enter when you’d like to hold the event, how long it will last, how much prep time is required, and click Schedule Event. You’ll find that there are both Standard and Advanced Options. Once you've set the options for your event, click the Schedule Event button to confirm and list the event -- and you're done! (Note: Invitation-Only events will not show up in the listings.)
Invite Your Guests
After you’ve scheduled your event, you can invite your friends or Club members. On the Events page, just click on the Invitations tab and you can enter up to 10 avatar names at a time to invite. Or you can just click the checkbox next to whatever Clubs you’d like to invite.
Manage Your Invitees
You can also manage all your invitees before and while your event is in progress. Just look at the Event Details page to assign VIP status to your favored invitees, and remove or even ban an unwanted guest.
- VIP Status
Want to give someone the red-carpet treatment? VIPs get preferential entry into your event, no matter how late they RSVP. The system will hold empty spots in the event for all your VIPs for the duration of your event. (Note: If the event is full when you assign VIP status to someone, they will move to the top of the waiting list.) - Remove
Select this option to teleport someone out of your event and/or Zone. That member may re-enter, as long as there is space in the event. Otherwise, they will be added to the waiting list. This is a good option if you are just issuing a warning, or giving an invitee time to cool off. - Ban
Select this option to ban someone completely from your event and/or Zone for the duration of your event. The banned member will not be allowed to re-enter or sign up for the event in progress. Once the event is over, they will be permitted enter the Zone again.
Ready to go? With a new outfit, your Zone decorated, and your friends invited, you’re all set to throw an amazing event!
Shop in There
Get Therebucks
Before you shop, you’ll need to get some Therebucks. The exchange rate is $1.00 USD = 1,800 T$. The quickest and easiest way is to purchase them. You can buy Therebucks with a credit card, PayPal, or PayByCash’s Ultimate Game Card. You can also send a check or money order. Click here for more details about payment options or look at the section below called "Get Therebucks", to find out other ways to get T$.
Get Basics and Specialty Items
If you’re just getting started in There, you’ll want to stock up on basics like hairstyles, drinks, and paintguns in Shop Central. You can also find fashions galore from popular name brands in the Specialty Shops section.
Get Unique Items and Great Deals
Besides Shop Central, products like fashions, props, vehicles, and home décor that are custom-made by other members can be purchased in the Auctions. There are tens of thousands of items to choose from! If you’ve got a Premium Membership, you can list and sell your own creations, too. Click here for more information about buying and selling items in the Auctions.
Visit an In-World Shopping Area
While you can shop the Auctions and Shop Central anytime -- whether you’re logged into There or not -- sometimes it’s fun to browse and try things in-world. Many shopping areas offer a 3D shopping experience, including mannequin stands that feature the latest clothing styles, and the Shop Central Showroom at There Orleans. Don’t miss the Village Marketplace, where many of There’s top designers have set up shops to display their wares.
View Outfit and View Decor
See something you like and want one for yourself? Find out who made it and where you can get it! If you’re in a decorated zone, just go to This Place > View Decor and you’ll see a page with a list of the items in that zone along with links to purchase them. If you see a stylin’ outfit on another avatar, ask them to enable the Allow View Outfit feature. Then click their Nametag and View Outfit Details to see info about their clothing items and links to purchase.
Shop at Yard Sales and Swaps
Sell or Trade Your Stuff
Yard Sales and Swaps are very popular events where members sell or trade items they no longer wish to own. For the seller, it’s a great way to make some T$ while cleaning out your inventory. For the buyer, it’s a fantastic opportunity to score some bargains!
Choose a Location
First, you’ll need to decide where you’d like the event to take place. If you own your own Zone and want to use that, you’re all set. If you don’t own your own PortaZone, FunZone, ThereHouse, or Neighborhood Lot, you can either buy one or use one of the Open Hosting Zones owned by There. A good place to search for these zones is by looking here and here. But make sure you check out the rules for hosting in the Public Zones!
Decide How You Want To Sell
Once you decide what items you want to sell, then it’s time to decide how you want to sell them. There are two options:
- Do a person-to-person swap or trade with an interested buyer.
If you choose this method, all you have to do is find a buyer and agree to the trade. But once you do, make sure that you always use the Secure Trade Window. For more information about person-to-person trades, click here. - Put them up for sale in the Auctions.
You need to be a Premium Member to sell in the Auctions. But if you are, this is a great way to sell your stuff! Just list each item you’d like to sell and save the Auction links. Then place a brochure with the specific link next to each item when you set up your Zone. For more information about selling in the Auctions, click here.
Set Up and List Your Event
Be sure to add your personal touch when decorating your Zone! Make it a fun and attractive place to visit. And when you place items on display, group them into categories like "Home Decor" or "Holiday Specials". Plan on being there to welcome people, answer their questions, and point them to items they might like. And if you’re the creator, consider using Item Dispensers and Mannequins to display your wares. Once everything’s looking good and ready for the big sale, set up and list your event!
Promotional Tips
Here’s a little advice from members who’ve done this before:
- Join a Yard Sales and Swaps Club. But only use one announcement to promote your event!
- Make sure you only invite Yard Sales and Swaps Clubs. Don’t invite every club you know.
- Be careful about placing your promotional flyer in places where it might not be appreciated.
And that's it! Are you ready to go? Good luck and have fun!
Design Clothing
Become a Developer
Our Developer Program allows members to create and sell items in There. It’s a fun way to tap your creativity, develop your design skills, and earn Therebucks! But before you get started, it’s important to note that you must be a Premium member to sell clothing in There. Click here to upgrade now.
Download and Install StyleMaker
StyleMaker is a fun tool that allows you to create custom avatar clothing -- even if you have little or no design experience. In fact, you can design and submit your creation without ever opening a paint program! And it’s perfect for advanced users, too. They can use StyleMaker with Photoshop or some other image-editing software to create completely unique designs. Ready to go? Click here to download StyleMaker now.
Design Your Fashions
Using StyleMaker is as easy as 1-2-3! Just follow the simple steps below. If you’re an advanced user and want to edit your texture using another program, you should read our Advanced Tips in the Help menu.
- Step 1: Design
Start by clicking Choose One from the menu bar at the top of the StyleMaker screen. Options will appear allowing you to customize your design part by part. The next step will always appear on the menu bar as Choose One. From the shape, to the texture, to the color, you decide exactly how you want your creation to look. - Step 2: Snapshot
Once your design is complete, use the File menu to Zoom In on your design and take a Snapshot. Make sure that your design fills up the entire window before taking the Snapshot. This Snapshot will be used as a catalog image to display your new design in There. - Step 3: Submit
Use the File menu option titled Submit to There to submit your product for approval. This will open up a small window in which you need to enter a product name, description, and choose a catalog image. After you click OK, you’ll go to a pre-filled submission page on the There Developer website. If you’re happy with what you see, just click Submit and you're done! (Note: All images should be .jpgs and product names should not contain quotation marks.)
Know the Guidelines
All items submitted by Developers will be reviewed by the Submissions Team to ensure that they comply with the content standards of There. So before you submit an item, make sure you know the Guidelines.
Approval and Ordering
Within about one to two weeks, the Submissions Team at There will send you approval -- or feedback on what needs to be done before the product can be re-submitted. Once your product is approved, you can either order products immediately or put one up for sale on Auctions. Products you order immediately will appear in your My Things menu.
Selling
Products in the My Things menu may be sold to other members directly. All you have to do is find a buyer and agree on a price. If you have Premium Membership, you can also list your product on Auctions. The listing will remain up for the amount of time you select, and the money from any sale is automatically transferred to your There account.
More Information
For more details, tools, and tutorials, visit our Developer Program. To connect with other developers and learn tips and tricks, visit our Developer Forums. And have fun! We look forward to seeing your new creations.
Design Vehicles
Become a Developer
Our Developer Program allows members to create and sell items in There. It’s a fun way to tap your creativity, develop your design skills, and earn Therebucks! But before you get started, it’s important to note that you must be a Premium member to sell vehicles in There. Click here to upgrade now.
Customize and Create Vehicles
There are many different types of vehicles in There, including Buggies, Hoverpacks, Hoverbikes, Hoverboards and Hoverboats. And you’ve got a few different choices for making your own. You can either customize a pre-made vehicle by painting it, or you can build an entirely new vehicle with an entirely new shape. Our suggestion? Try painting a few first, then move on to building.
Download and Install the Tools
From the Painter Toolkit, you’ll need Previewer and the Vehicle Painter Templates. From the Builder Toolkit, you’ll need Previewer, Exporters, and the Vehicle Builder Templates. Ready to go? Click here to download the tools now!
About Painter Templates
When you’ve downloaded the Vehicle Painter Templates, unzip the Vehicle Template Folder. These folders contain sub-folders with the names of the paintable models available for you to customize. Each of these sub-folders has a .model file and some corresponding textures.
Painting Instructions
To create a functional Painter Vehicle Model, you’ll need to:
- Load a .model file into Previewer.
- Take each of the textures and modify them in a paint program.
- Load the modified textures onto the model in Previewer.
- Continue modifying until you’re satisfied with the way they look.
- Submit your model to There!
Paint Programs
The most popular paint programs include Adobe Photoshop, Paint Shop Pro, Gimp, and MS Paint. Some of these programs will cost hundreds of dollars and some are free. MS Paint is probably on your computer already, but it’s very basic and can be difficult to create high quality textures. Gimp is also free and is available as a download from www.gimp.org.
About Builder Templates
To build your own custom vehicle models, make sure you’ve already downloaded and unzipped the Vehicle Builder Templates. Some of the Builder Template Folders will contain sub-folders with the names of various paintable models.
Folders and Sub-Folders
Look inside each of the individual folders for a .gmax file, a .max file, and textures that go with this type of item. Remember, some item sub-folders will contain one texture while others will contain many textures, depending on the complexity of that item. Some of the Builder Template Folders will contain all of the models inside the main folder. For these folders, look for the .html file to see which textures go with each model file.
Building Instructions
To create a functional Builder Model, you’ll need to:
- Choose a template to use for the new model.
- Modify the .gmax or .max file and materials to your liking.
- Check “Specifications” in the Help menu so you can stay within specifications.
- Export the file from Gmax or 3ds Max into the .model file format using the Export option in the File menu inside the modeling program.
- Load the .model file you just exported into Previewer.
- Load the modified textures onto the model in Previewer.
- Continue modifying the model and materials until you like the way it looks.
- Submit your model to There!
Builder Programs
In order to create your original designs, you’ll need to use either Autodesk’s 3DS Max or Gmax to manipulate the files contained in the Builder Template Packs. Gmax is available for free with registration at www.turbosquid.com/gmax. You’ll also need a third party paint program to modify the textures. Some popular programs include Adobe Photoshop, Paint Shop Pro, Gimp, and MS Paint.
How to Submit Your Vehicle
Use the File menu option titled Submit to There to submit your product for approval. This will open up a small window in which you need to enter a product name, description, and choose a catalog image. After you click OK, you’ll go to a pre-filled submission page on the There Developer website. If you’re happy with what you see, just click Submit and you're done! (Note: All images should be .jpgs and product names should not contain quotation marks.)
Know the Guidelines
All items submitted by Developers will be reviewed by the Submissions Team to ensure that they comply with the content standards of There. So before you submit an item, make sure you know the Guidelines.
Approval and Ordering
Within about one to two weeks, the Submissions Team at There will send you approval -- or feedback on what needs to be done before the product can be re-submitted. Once your product is approved, you can either order products immediately or put one up for sale on Auctions. Products you order immediately will appear in your My Things menu.
Selling
Products in the My Things menu may be sold to other members directly. All you have to do is find a buyer and agree on a price. If you have Premium Membership, you can also have your product listed for you on Auctions. The listing will remain up for the amount of time you select, and the money from any sale is automatically transferred to your There account.
More Information
For more details, tools, and tutorials, visit our Developer Program. To connect with other developers and learn tips and tricks, visit our Developer Forums. And have fun! We look forward to seeing your new creations.
Get Therebucks
Buy Therebucks
The quickest and easiest way to get Therebucks (T$) is to purchase them. You can buy Therebucks with a credit card, PayPal, or PayByCash’s Ultimate Game Card. You can also send a check or money order. Click here for more details about payment options. The exchange rate is $1.00 USD = 1,800 T$.
Win Therebucks
From time to time, you’ll have the opportunity to win T$ by participating in a contest, challenge, or special event. Official >There challenges are posted to the There Fun Times. Some member events also offer T$ prizes and are posted in Activities.
Earn Therebucks
There's Developer Program is a great opportunity for both new and experienced designers to customize their in-world experience and to make T$ along the way. It allows you to design, build, and sell your own avatar fashions, vehicles, home décor, and more! All you have to do is get your item approved through our submissions process, and you’re ready to go. You can sell your creations avatar-to-avatar or -- if you have a Premium Membership -- you can also list your items in the Auctions.
Find Therebucks
Sparkles are small items that suddenly appear -- and then disappear! A Sparkle can take the form of just about anything. It can be a bottle, a seashell, or any of the other small treasures that you might find while exploring different places. You’ll know you’ve found a Sparkle when you see an item randomly appear with a little "sparkle effect". If you see one, get close and click its Action Tag. Sometimes a Sparkle will give you an item for your inventory, and other times it will give you some T$!